Pages

Monday, December 20, 2010

Lights in Maya

Maybe you know or maybe not in Maya we have 6 official types of lights: ambient, directional, point, spot, area and volume and one additional light source: any material with incandescence greater than 0.
I already read a lot documentation about all those light types but I never find them together in the same picture to see differences between them, so I decided to do this myself.
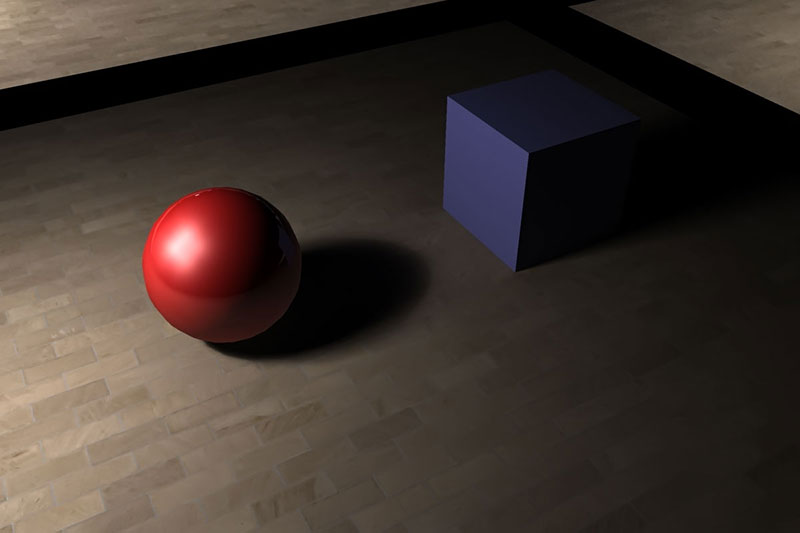
I made this scene
with all lights available from Maya, every light source is linked with one objects group
and in this way light will affect only those objects. For incandescent light I made a box to surround those objects to keep the light inside and from shape attribute I chose to make that box invisible for render.
 All lights are at the same highs and at the same distance from linked objects. All lights have the same intensity set on 2 except  incandescent light source where I set incandescence to 100 (you can do that from channels when the material is selected in hypershade). All lights have the same settings for ray trace shadow except volume light where we don't have those settings and incandescent material source which is not defined as a true light. All lights have no decay rate set, spot, directional and area lights are set to 45 degree from horizontal, all materials are standard lambert and all shapes are standard shapes, spheres have the same numbers of subdivisions, all boxes have no bevel.
Below you can see the difference between the lights, you can see how the same material react at the different type of lights, how each light react at the same intensity and what shadow make each at the same shadow settings.
 And now same scene with each light rendered closer:
1.Ambient light
2.Point light
3.Area light
4.Volume light
5.Spot light
6.Directional light
7. Incandescent material light

Thursday, December 16, 2010

Some basic rules in Maya

I made this 3D scene in Maya,
for a Christmas card, and I notice there are some tricks to know when you are working with boolean operation from polygons/mesh/booleans. Working with booleans is simple, first select the children (object what will be modified), pres Shift and select the parent (object what will do the modification) and chose from polygons/mesh/booleans the operation, if you want to make a hole chose: difference.
After the operation is done, you still can modify the dimensions of the objects involved, if you click on outliner (window/outliner) on the initial objects (not on the new shape obtained) and from channels you can do the modification.
 
For more output options when you work with booleans, or if something in not working properly, check the normals for the objects involved and try different settings. To do that, first select the objects and make normals visible from Display/Polygons/Face Normals (if you want to make them invisible repeat this step) and with only one object selected go to polygons Normals/Reverse. Now try different combinations with normals and booleans until you will be happy with your result. Attention, if you want to bevel the objects make this operation before any boolean operation because after that you will have only errors. If you want to modify later some geometry in the resulting shape, is highly recommended to bevel objects first because all faces which are not involved in the booleans operations will be fully editable.

Monday, December 13, 2010

The challenge

I graduated engineering and I have experience in 3D CAD design, I used Solid Edge, SolidWorks and Catia and now I am working in Maya. Transition from 3D CAD design, where everything is very precise, to 3D Maya designs where you have a lot of freedom it is a big challenge.
For you, people, the big challenge is to stay focused because I know my English is in improvement process, right now, but I am sure in time will be better.
I hope to have debates on every post I will write and I will wait to share from your experiences.
Related Posts Plugin for WordPress, Blogger...